XR ANALYTICS
Find answers traditional platforms can’t even imagine
Interactive Demos
Why XR Analytics?
VR & AR systems are more complex than any other computation devices, they provide a ton of data that can be utilized in ways never thought of before.
NEW MEDIA
XR is more immersive, more engaging and enhances presence. Interaction in XR are fundamentally different, therefore the data generated is also different. Analytics for this data help you create better content.
BETTER UNDERSTAND USERS
VR & AR give you the power to understand user interests and behaviour based on their interactions, movements and vision. XR analytics makes this more Human.
BUILD BETTER, SELL BETTER
Knowing users behavior and interests helps in creating better content and monetization. Be it a game, V-Commerce store, Automotive, or Real Estate, data-backed feedback helps improve design decisions.
WHY VadR?
The VadR platform is intuitive and easy to use. At the same time it is extremely powerful and gives you the relevant metrics you need. Advanced data visualization helps in generating insights quickly.
FEATURES
VadR is built with VR & AR in mind and its vast applications. Features covering all bases, in every possible application of XR, giving you the most out of your data.
XR SPECIFIC METRICS
User Gaze, Position and Movement analysis, Object engagement, Device performance etc. XR analytics needs to make sure that the true power of XR is being used. With a focus on user, XR never seemed this easy to understand.
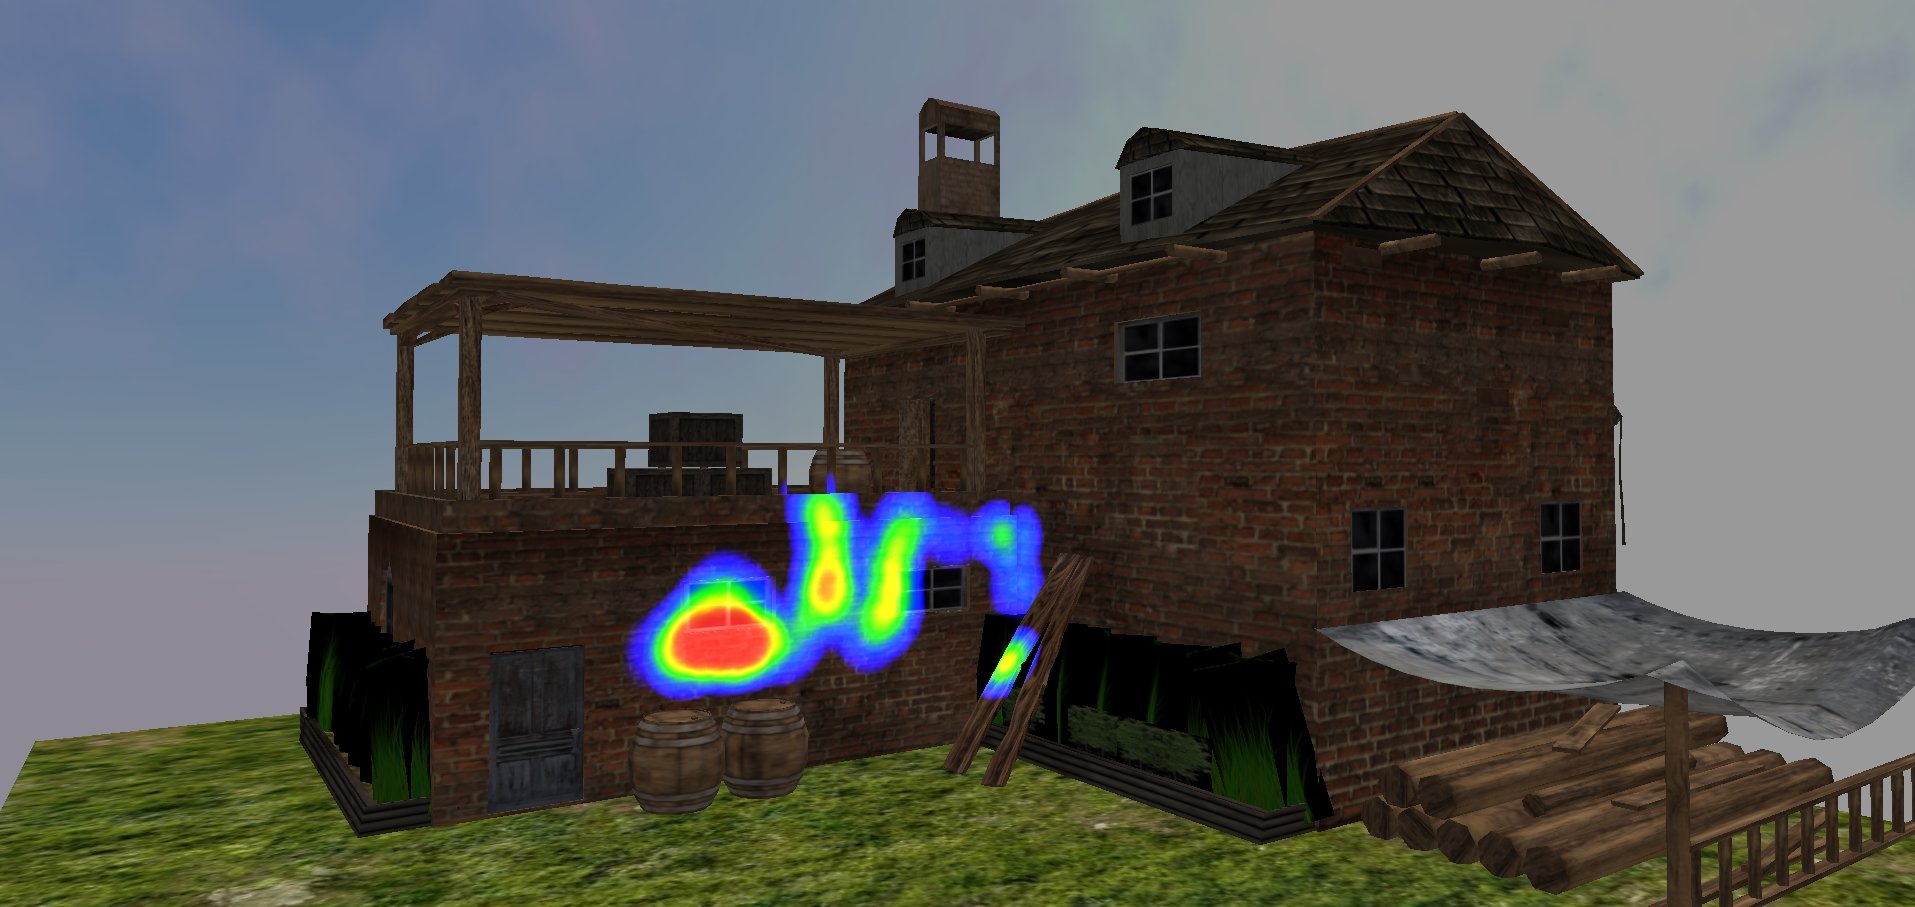
POWERFUL VISUALIZATION
Heatmaps form the core of our VR analytics platform. Heatmaps overlaid on 3D model of your VR world gives holistic and highlevel view into users’ mind. Heatmaps are not only interactive but also flexible for your needs.
DRAG AND DROP SDK
No lengthy code lines, no modifications to your base code, just an easy Drag and Drop SDK, that requires no more than 120 seconds to integrate. Once integrated, we’ll take care of processing data and all your analytics need.
EASY TO CUSTOMIZE
We understand that each one of your content is different and need to monitor different parameters. Register any event that is relevant to you with just a single line of code. Customize your dashboard and see any data the way you like.
CROSS PLATFORM
VadR supports multiple platforms and engines. Integrate our SDK for Unity or Unreal Engine. Our SDK is compatible with major VR Headsets including Vive, Rift, Daydream, Gear VR, Cardboard, etc and different Operating Systems.
UBIQUITOUS ACCESS
With VadR’s web based dashboard, you can access all your data from anywhere at anytime, on a mobile device or from your desktop, and customize according to your need. Share access with your team and make collaborative decisions. LEARN MORE
VadR in News
- VR PERCEPTION It has shifted analytics from numbers and analytical models to engagement and feelings. There is more human in VR analytics.
- VIRTUAL REALITY REPORTER VR analytics is making VR more centred around users.
- AFFINITY VR VadR has big plans for the future and is working on multiple fronts.
- VR PERCEPTION It has shifted analytics from numbers and analytical models to engagement and feelings. There is more human in VR analytics.
- VIRTUAL REALITY REPORTER VR analytics is making VR more centred around users.
- Growth Enabler top rated AR & VR startup
- Exhibiting at #VRLA2018 on May 4-5. Come talk to us about how can you increase effectiveness of your content.

VR analytics is making VR more centered around users.
Virtual Reality Reporter

It has shifted analytics from numbers and analytical models to engagement and feelings. There is more human in VR analytics.
VR Perception

VadR has big plans for the future and is working on multiple fronts.
Affinity VR
Contact Us
One East Washington Street
Phoenix AZ USA 85004
contactus@vadr.io +1 347 535 0844
Site Links
© 2023 VadR by Hyperspaceᵐᵛ